
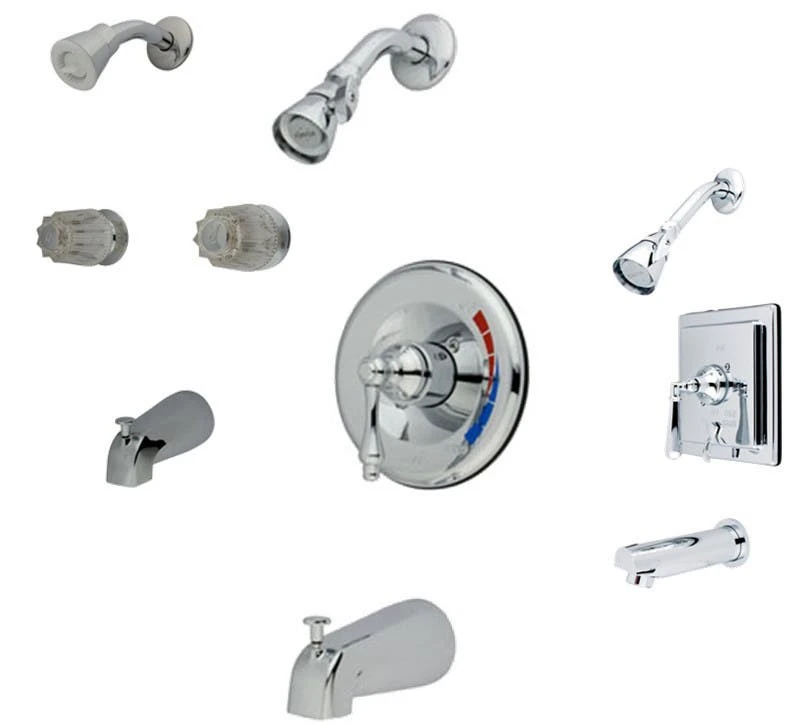
This how-to overview will deal with those situations where your SHOWER FAUCET shutoff will certainly still trickle water even after turning off the shower shutoff. It will not manage other sorts of leakages.
Table of Contents
DETERMINE THE KIND OF SHOWER SHUTOFF YOU HAVE
Let’s state there is nobody response on exactly how to fix a leaking tub Shower Faucet. Mostly since there are a few various systems, and each has its intrinsic problems. To start, allow’s identify what sort of shower valve you have.
Try to find a brand name either on the faceplate or on the deal. That might assist you to limit what cartridge you might have. If you’re lucky sufficient to have a shower shutoff from a smaller-sized brand such as Mixet ®, then your search would be fairly extra uncomplicated.
When it’s a much more substantial brand name such as Delta, Moen, or Kohler you might need to do a bit a lot more digging. In many cases, you might not be able to recognize. what kind of cartridge do you have until you eliminate the stem or the cartridge from the valve. So let’s take things one action at once.
GET RID OF THE HANDLE
Normally takes care of are connected by either a screw that you can find by eliminating the hot/cold indication on each deal. Most likely these indication buttons are kept in area by stress. In which case you can easily remove them by placing something thin such as a blade as well as delicately as well as thoroughly popping it out.
In other cases, the deal is held by a tiny collection screw located on the “neck” of the deal. It could be covered by a switch that can be easily gotten rid of. A small Allen (Hex) kind wrench is all you need to loosen the set screw enough to be able to pull the take care of.
SHOWER FAUCET WATER SUPPLY
When you have actually removed the take care of and all the various other decorative items such as flanges or cover plates. you should be able to see if your valve is outfitted with essential screwdriver quits.
These should appear like a thin shaft with a port cut on top. It will certainly be situated on both inlets to the valve if you do transform both of these shutoffs. Do it in a clockwise direction until they are totally closed.
If you do not have screwdriver stops then you ought to turn off the water supply to your house currently. When you make certain that there is no water entering into your shutoff, remove the cartridge or stem.
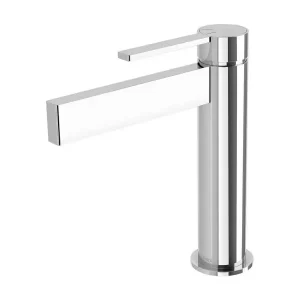
IF YOU HAVE A SOLITARY HANDLE SHOWER FAUCETS
When it pertains to single-handle showers, there are many variants.
However, there are three main types:
Cartridge type: Although there are many types of cartridges, we are most likely to pack them in this instance considering that the repair service, as well as replacement of cartridges, is primarily the same treatment. Remove the retainer sleeve or nut as well as meticulously pull the cartridge. You can identify your cartridge by going to this cartridge selector tool.
If you have a solitary manage ball-type valve, then you will certainly most likely have to change the springtimes and washers. When you explore the cartridge well after getting rid of the stainless-steel sphere, you ought to see 2 black rubber washers.
Continuing them ought to feel a little bit springy. Unfortunately, after time that springtime loses its stress allowing water to permeate through causing a drip. You can use a small screwdriver and also insert it with the hole in the center and draw the springtime as well as the washer as well as replace with a brand-new set. IF YOU HAVE A 2 OR 3 MANAGE SHOWER.
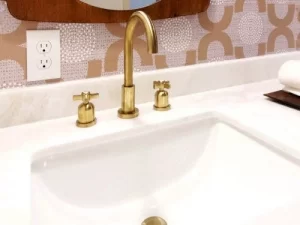
In this situation, there are 3 major sorts of cartridges or stems:
COMPRESSION:
The majority of people over 40 might bear in mind. When you needed to transform the manage a total change or more to obtain the amount of water we needed. A compression bathtub SHOWER faucet controls the circulation of water by relocating a shaft up and down in a spiral style pressing a rubber washing machine versus a raised circular insert, additionally called a seat.
Unfortunately, gradually, the rubber washer obtains a bit used and sometimes, the seat will likewise wear away permitting water to leak with to repair this type of shower valve After shutting down the water supply to the valve.
Get rid of the deal with and stem. At the end of the stem, you will see a small black rubber washing machine, which is normally the part that breaks, creating the leak. We advise that you alter the seats as well.
This can be attained with the help of a seat wrench, which is a cost-effective little device that will save a great deal of time. Change the seat and proper rubber washing machine at the bottom of the stem
WASHERLESS:
You can rapidly recognize a washerless cartridge. When you pull the cartridge out, you will certainly discover a stainless steel plate on the bottom of the cartridge. It will certainly have a crescent form cut-out or two smaller-sized circular openings.
Additionally, if you look inside the cartridge well, you will see a circular rubber washing machine. After shutting down the supply of water to the valve, eliminate the maintaining collar. You might see the cartridge is kept in location by two notches cut into the sides.
Prior to pulling on the cartridge, please pay attention to how the cartridge is set up so you can install it in the very same placement. Pull Cartridge Insert a tiny screwdriver or small Allen wrench in the center of the rubber washer as well as carefully pull the washer in addition to the spring. Usually, the substitute springtime and washing machines are conveniently readily available at most equipment stores.
CERAMIC CARTRIDGE
Ceramic cartridges are easy to determine. When you look at the bottom of the cartridge, you will certainly see a white ceramic carbide disk with 2 triangular opposing cut-outs.
Ceramic carbide is unsusceptible rubbing but being ceramic, it is fragile, as well as these disks can damage if there occurs to be any type of particles captured in the disks as somebody tries to shut the valve After shutting off the water to the valve.
Using an adjustable wrench and turning counter-clockwise, unscrew the cartridge. Locate a precise replacement and also re-assemble.